
Track income and expenses by class, location, or property
A category says what money was for, such as rent or supplies. A class says which part of the business it belongs to: a department, a property, a job, a location or a fund. Give your transactions a class as well as a category, and Profit & Loss can show one column per class, so you can see which part of the business makes money.
BooksGPT calls these dimensions. Class is the usual one, and you can add others, such as Location or Property. If you came from QuickBooks, they are the same thing as its Classes and Locations.
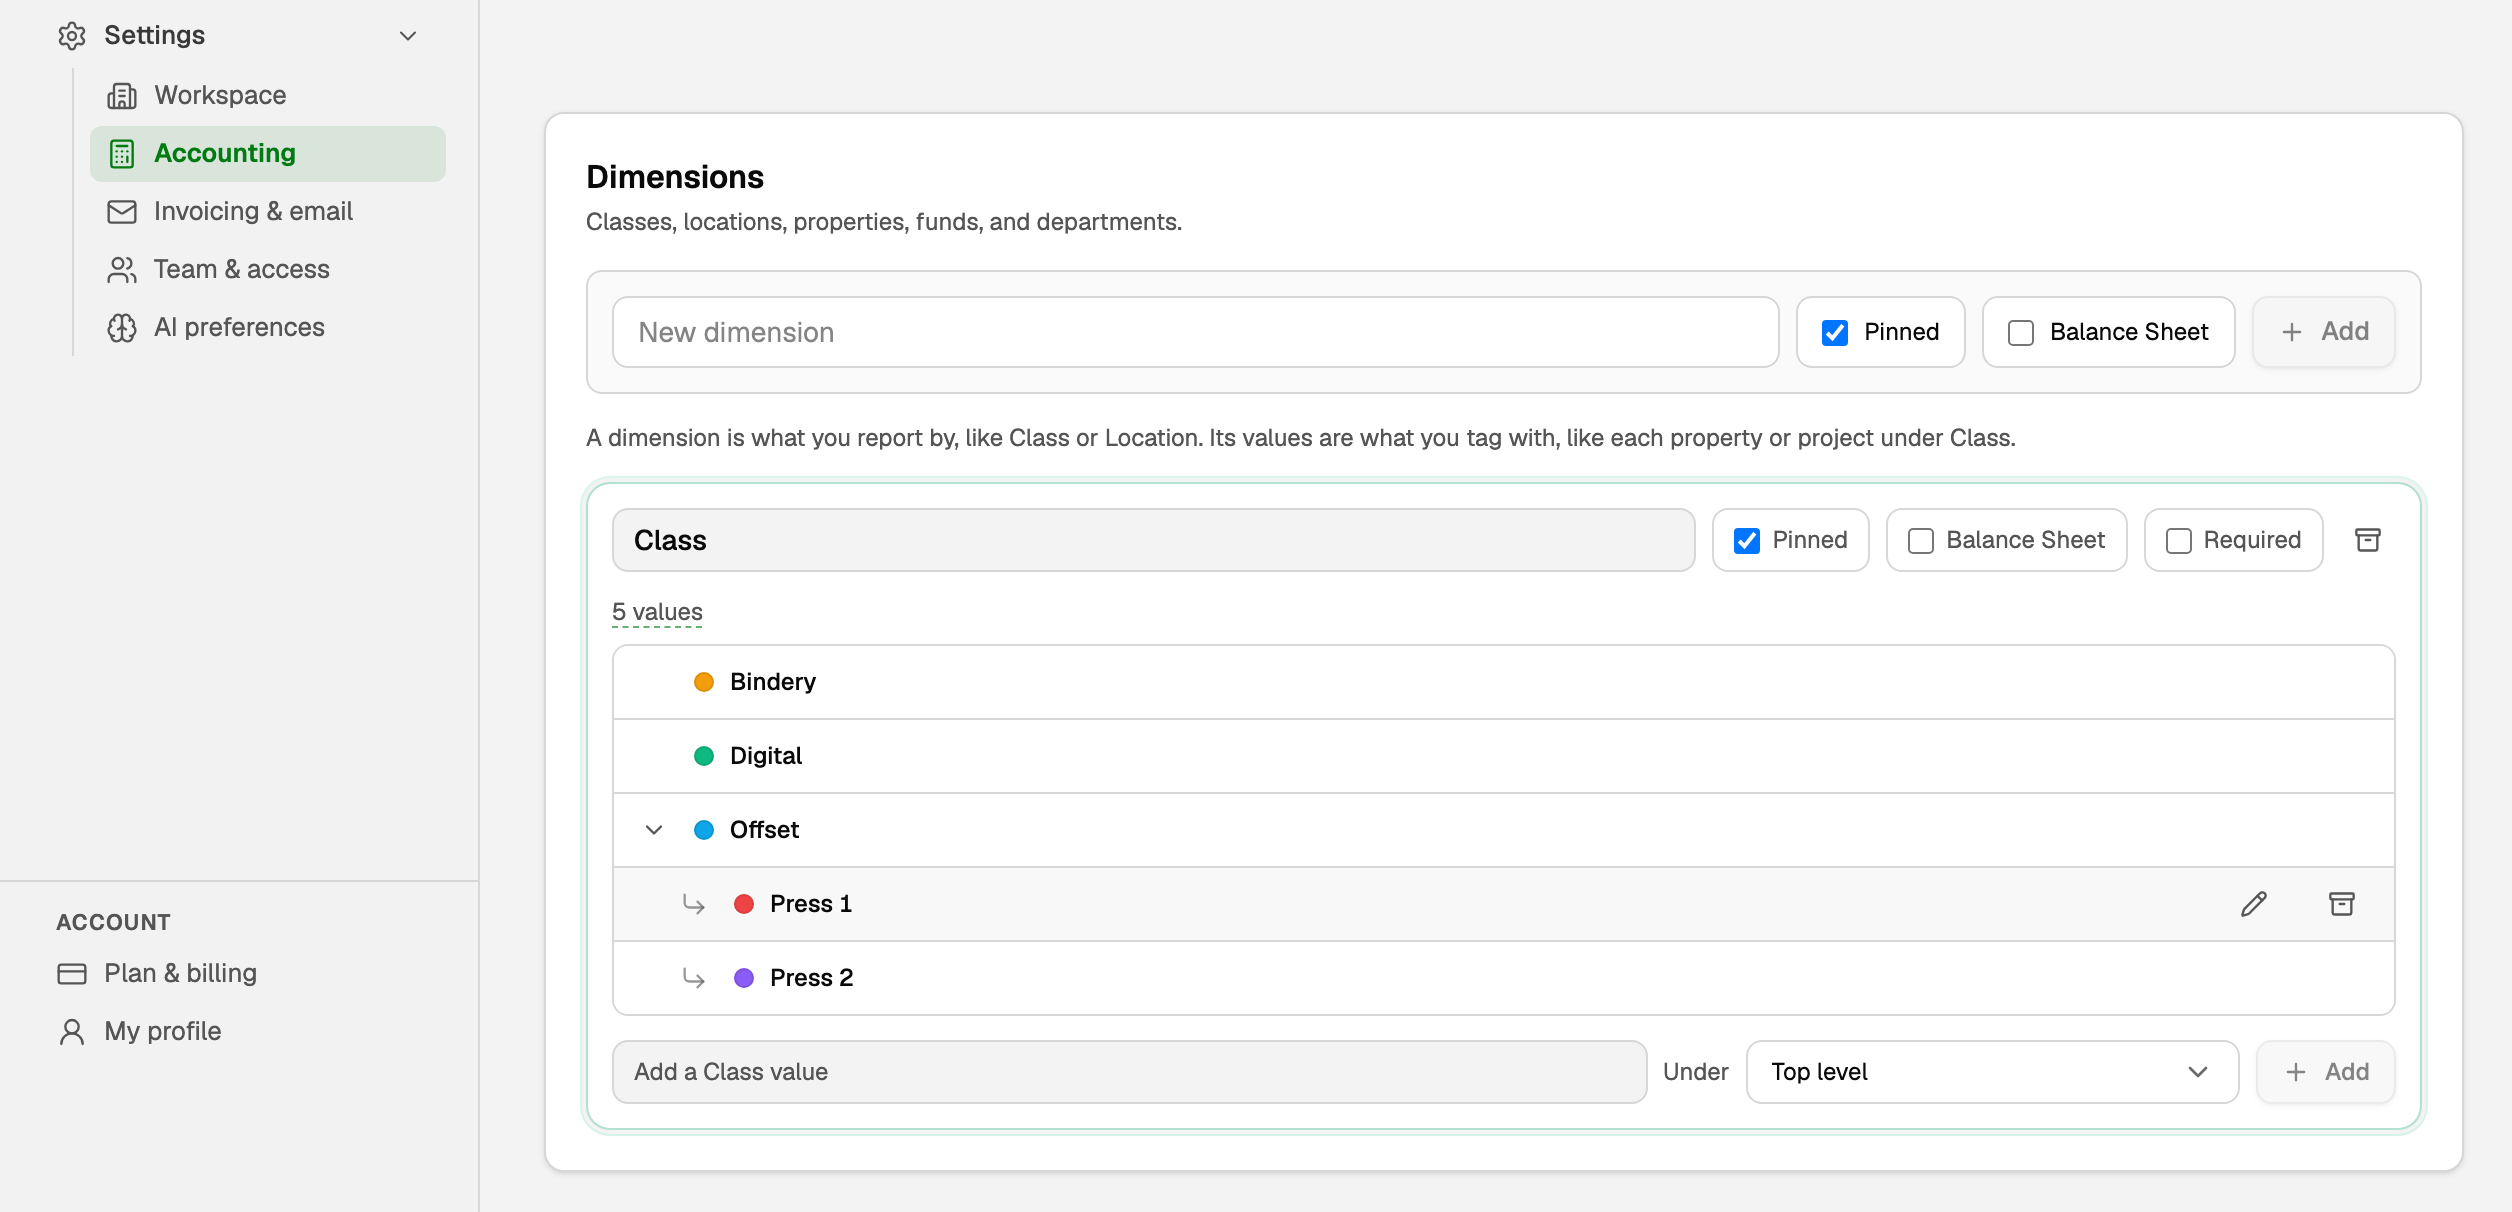
Ridgeline Print Co, for example, has one dimension, Class, for its Offset, Digital and Bindery departments.
Set up a dimension
- Open All pages in the left sidebar, then click Accounting and Dimensions. This opens Settings at Accounting, on the Dimensions section.
- Type a name in New dimension, such as Class, Location or Property, and click Add.
- In the box under it (Add a Class value for a dimension named Class), type each value and press Enter: one per department, property or job.
- Tick Pinned to show the dimension as a column on Transactions. Up to two can be pinned.
- Tick Required if every bill must carry a value before it can be posted.
- Leave Balance Sheet off unless each value needs its own balance sheet, such as a fund that must balance on its own.
Setting up dimensions takes the owner or bookkeeper role.
If you use Projects (under Sales in All pages), its Project and Cost type dimensions appear here, marked Projects. You manage them on the Projects page, which can also turn a dimension named Job or Project into projects.
Put a value under another
A value can sit under another, such as each press under Offset. Reports still give every value its own column.
- Hover over the value and click its pencil.
- Pick the parent in Sits under.
- Click Save.
For a new value, pick the parent in Under first.
Classes from QuickBooks
A QuickBooks import usually brings your classes:
- A connected QuickBooks Online company brings Class and Location as dimensions, tagged From QuickBooks, with the classes on your past transactions.
- A General Ledger file with a Class or Location column brings them too. For QuickBooks Desktop, add that column before you export; see Import from QuickBooks Desktop.
- A sub-class arrives under its parent class by its short name: Offset:Press 1 becomes Press 1 under Offset. From a file, the parent class must be in the file too.
A value's pencil renames or moves it; importing again restores the QuickBooks name. Anything QuickBooks never classed arrives with no class, so it shows as Unassigned on reports.
Tag your transactions
Open Transactions, then use whichever fits:
- One row: click its Class cell and pick a value. On a phone, or for an unpinned dimension, open the transaction with the arrow at the end of its row.
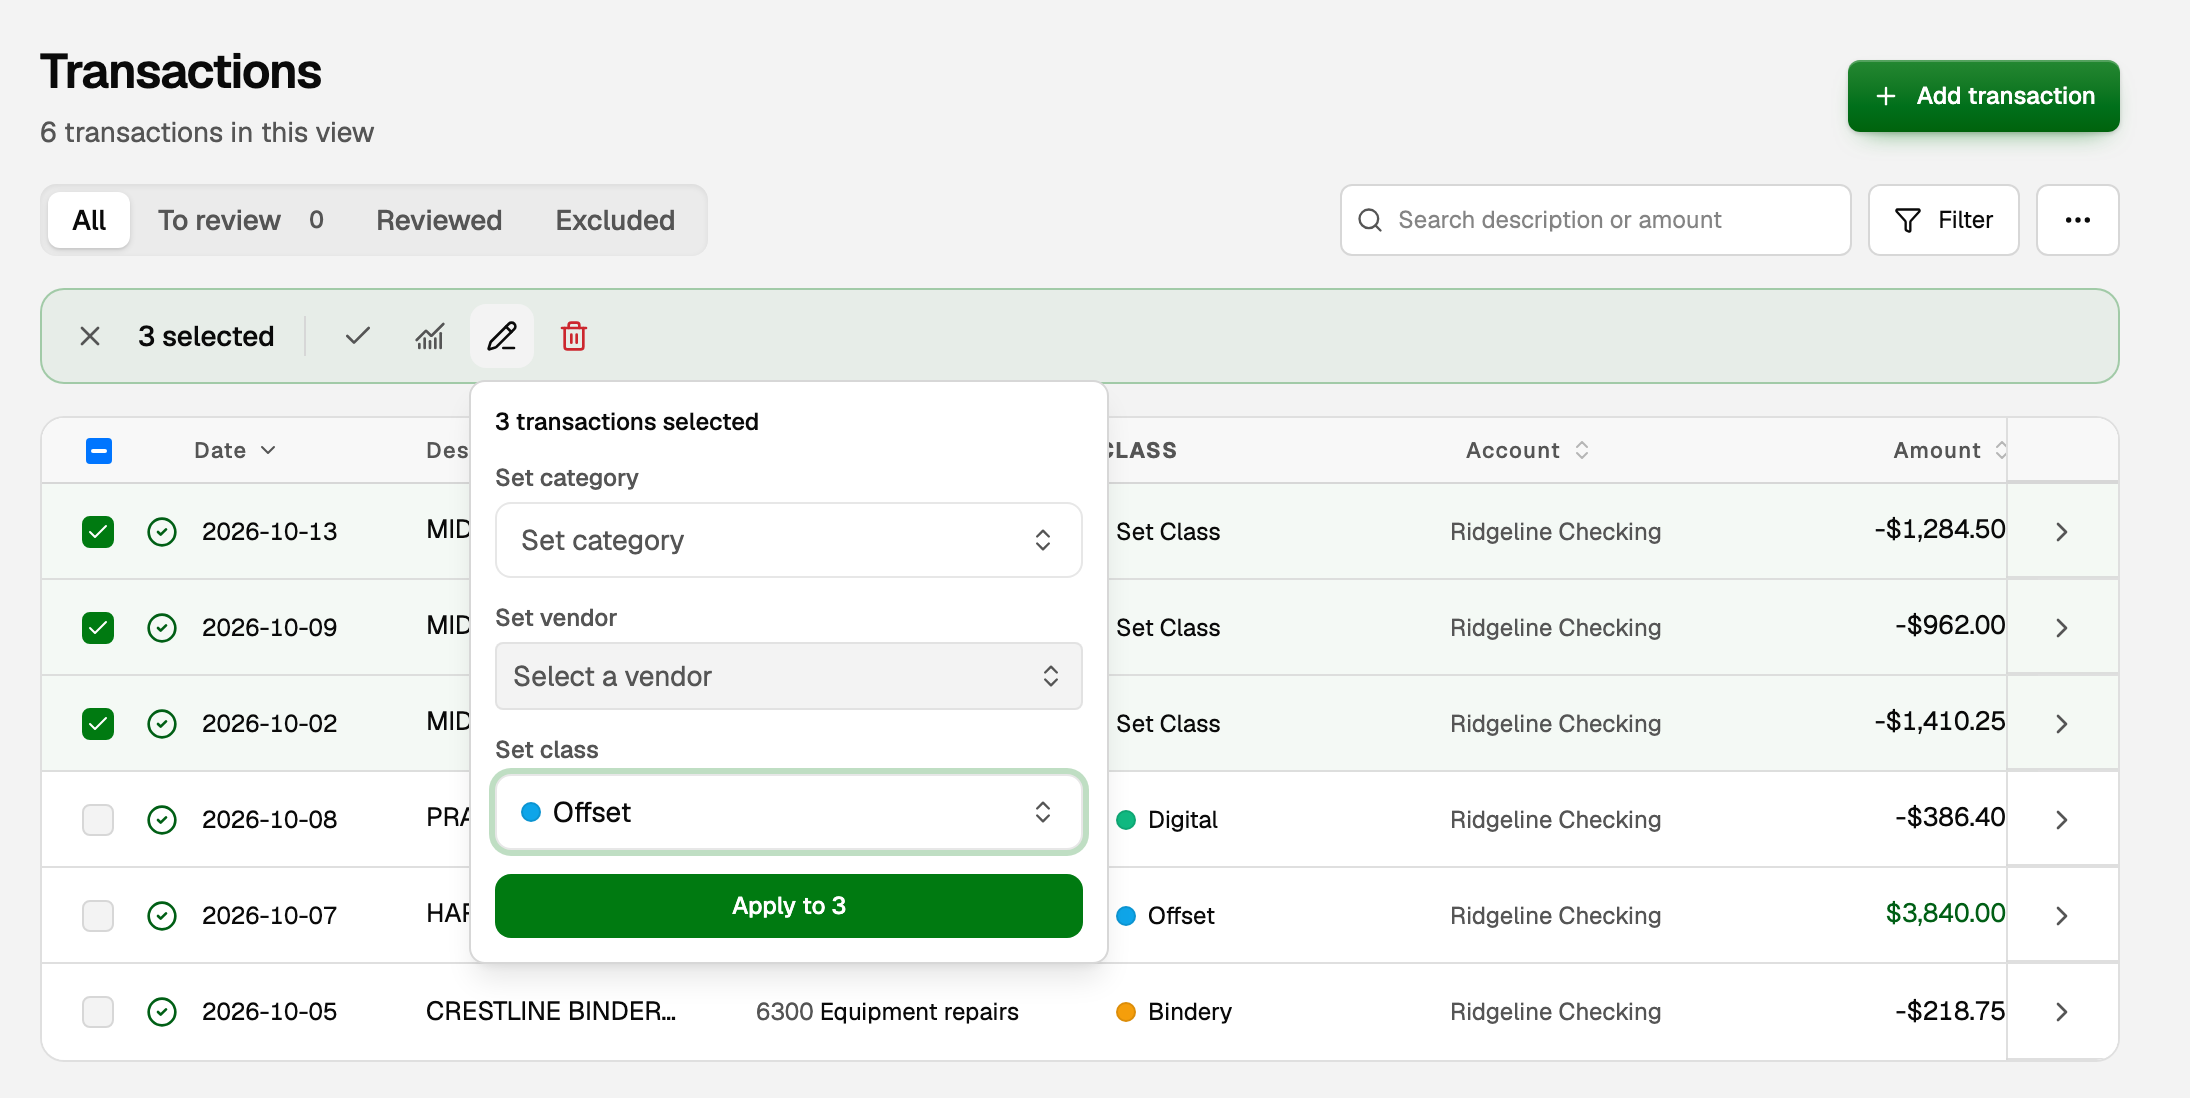
- Many rows: tick them, click the pencil icon in the bar above the list (Bulk edit), pick a value under Set class, then click the green Apply to button.
- Bills: in the bill editor, pick a class under Bill dimensions for the whole bill, or give one line a different class under Line dimension overrides.
- Journal entries: each line can carry a class.
A reconciled transaction can still take a class, and the reconciliation still ties.
You can also ask the Copilot, for example "put every Midland Paper charge on Offset". It prepares a card, and nothing changes until you approve it.
Give an account a default class
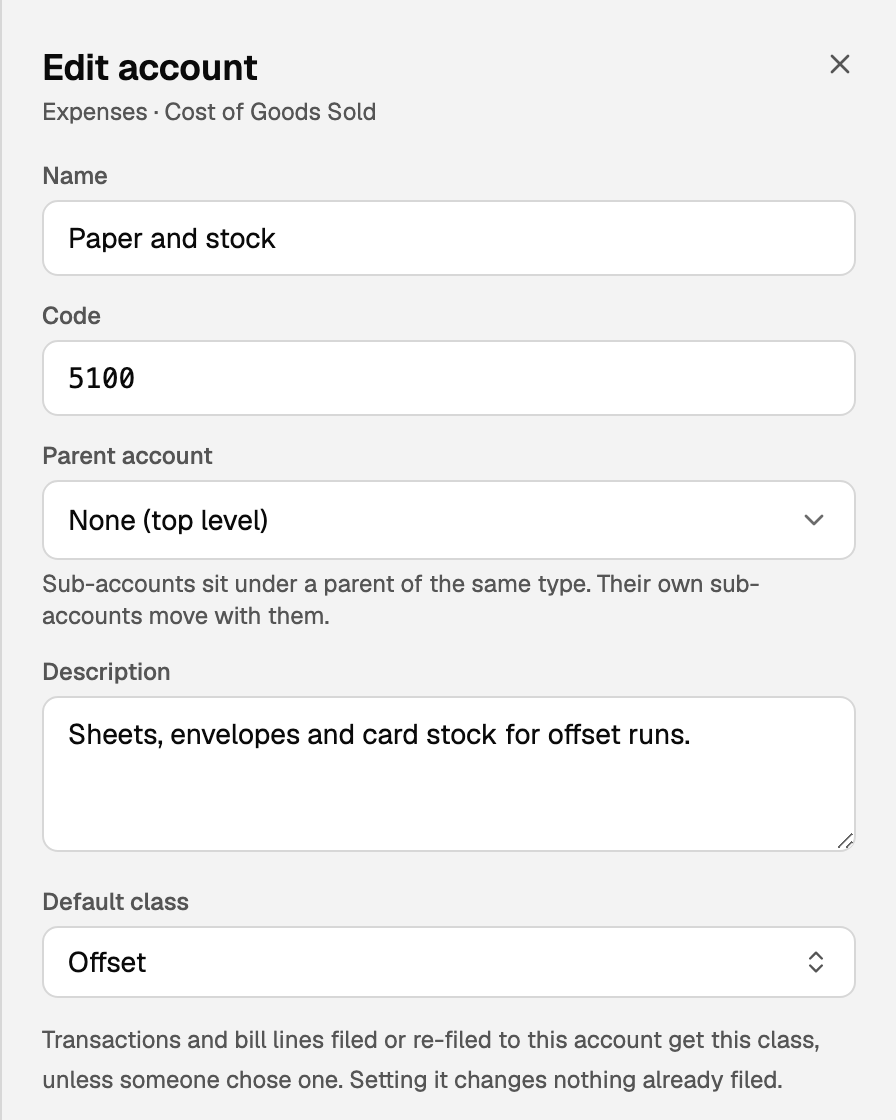
Some accounts always belong to one class. Ridgeline buys paper only for its offset presses, so Paper and stock gets the default class Offset.
- Open All pages, then click Accounting and Chart of accounts.
- Click the ... button at the end of the account's row, then Edit account.
- Pick a class in Default class, then click Save. To remove a default later, pick No default.
From then on:
- A transaction or bill line filed to that account gets the class when it has none, whoever files it, rules and the Copilot included.
- A class somebody picked is never replaced.
- Nothing already filed changes. To tag older transactions, use Bulk edit.
A bank or credit card account can't take a default: set it on the category instead. To give many accounts one default, tick them on Chart of accounts and click Set default class in the bar (Set defaults when you have more than one dimension).
See profit by class
- Open All pages, then click Reports and Profit & loss.
- Pick the period as usual.
- In the columns control, switch from Total to By Class. If you have more than one dimension, pick the one you want in the menu beside it.
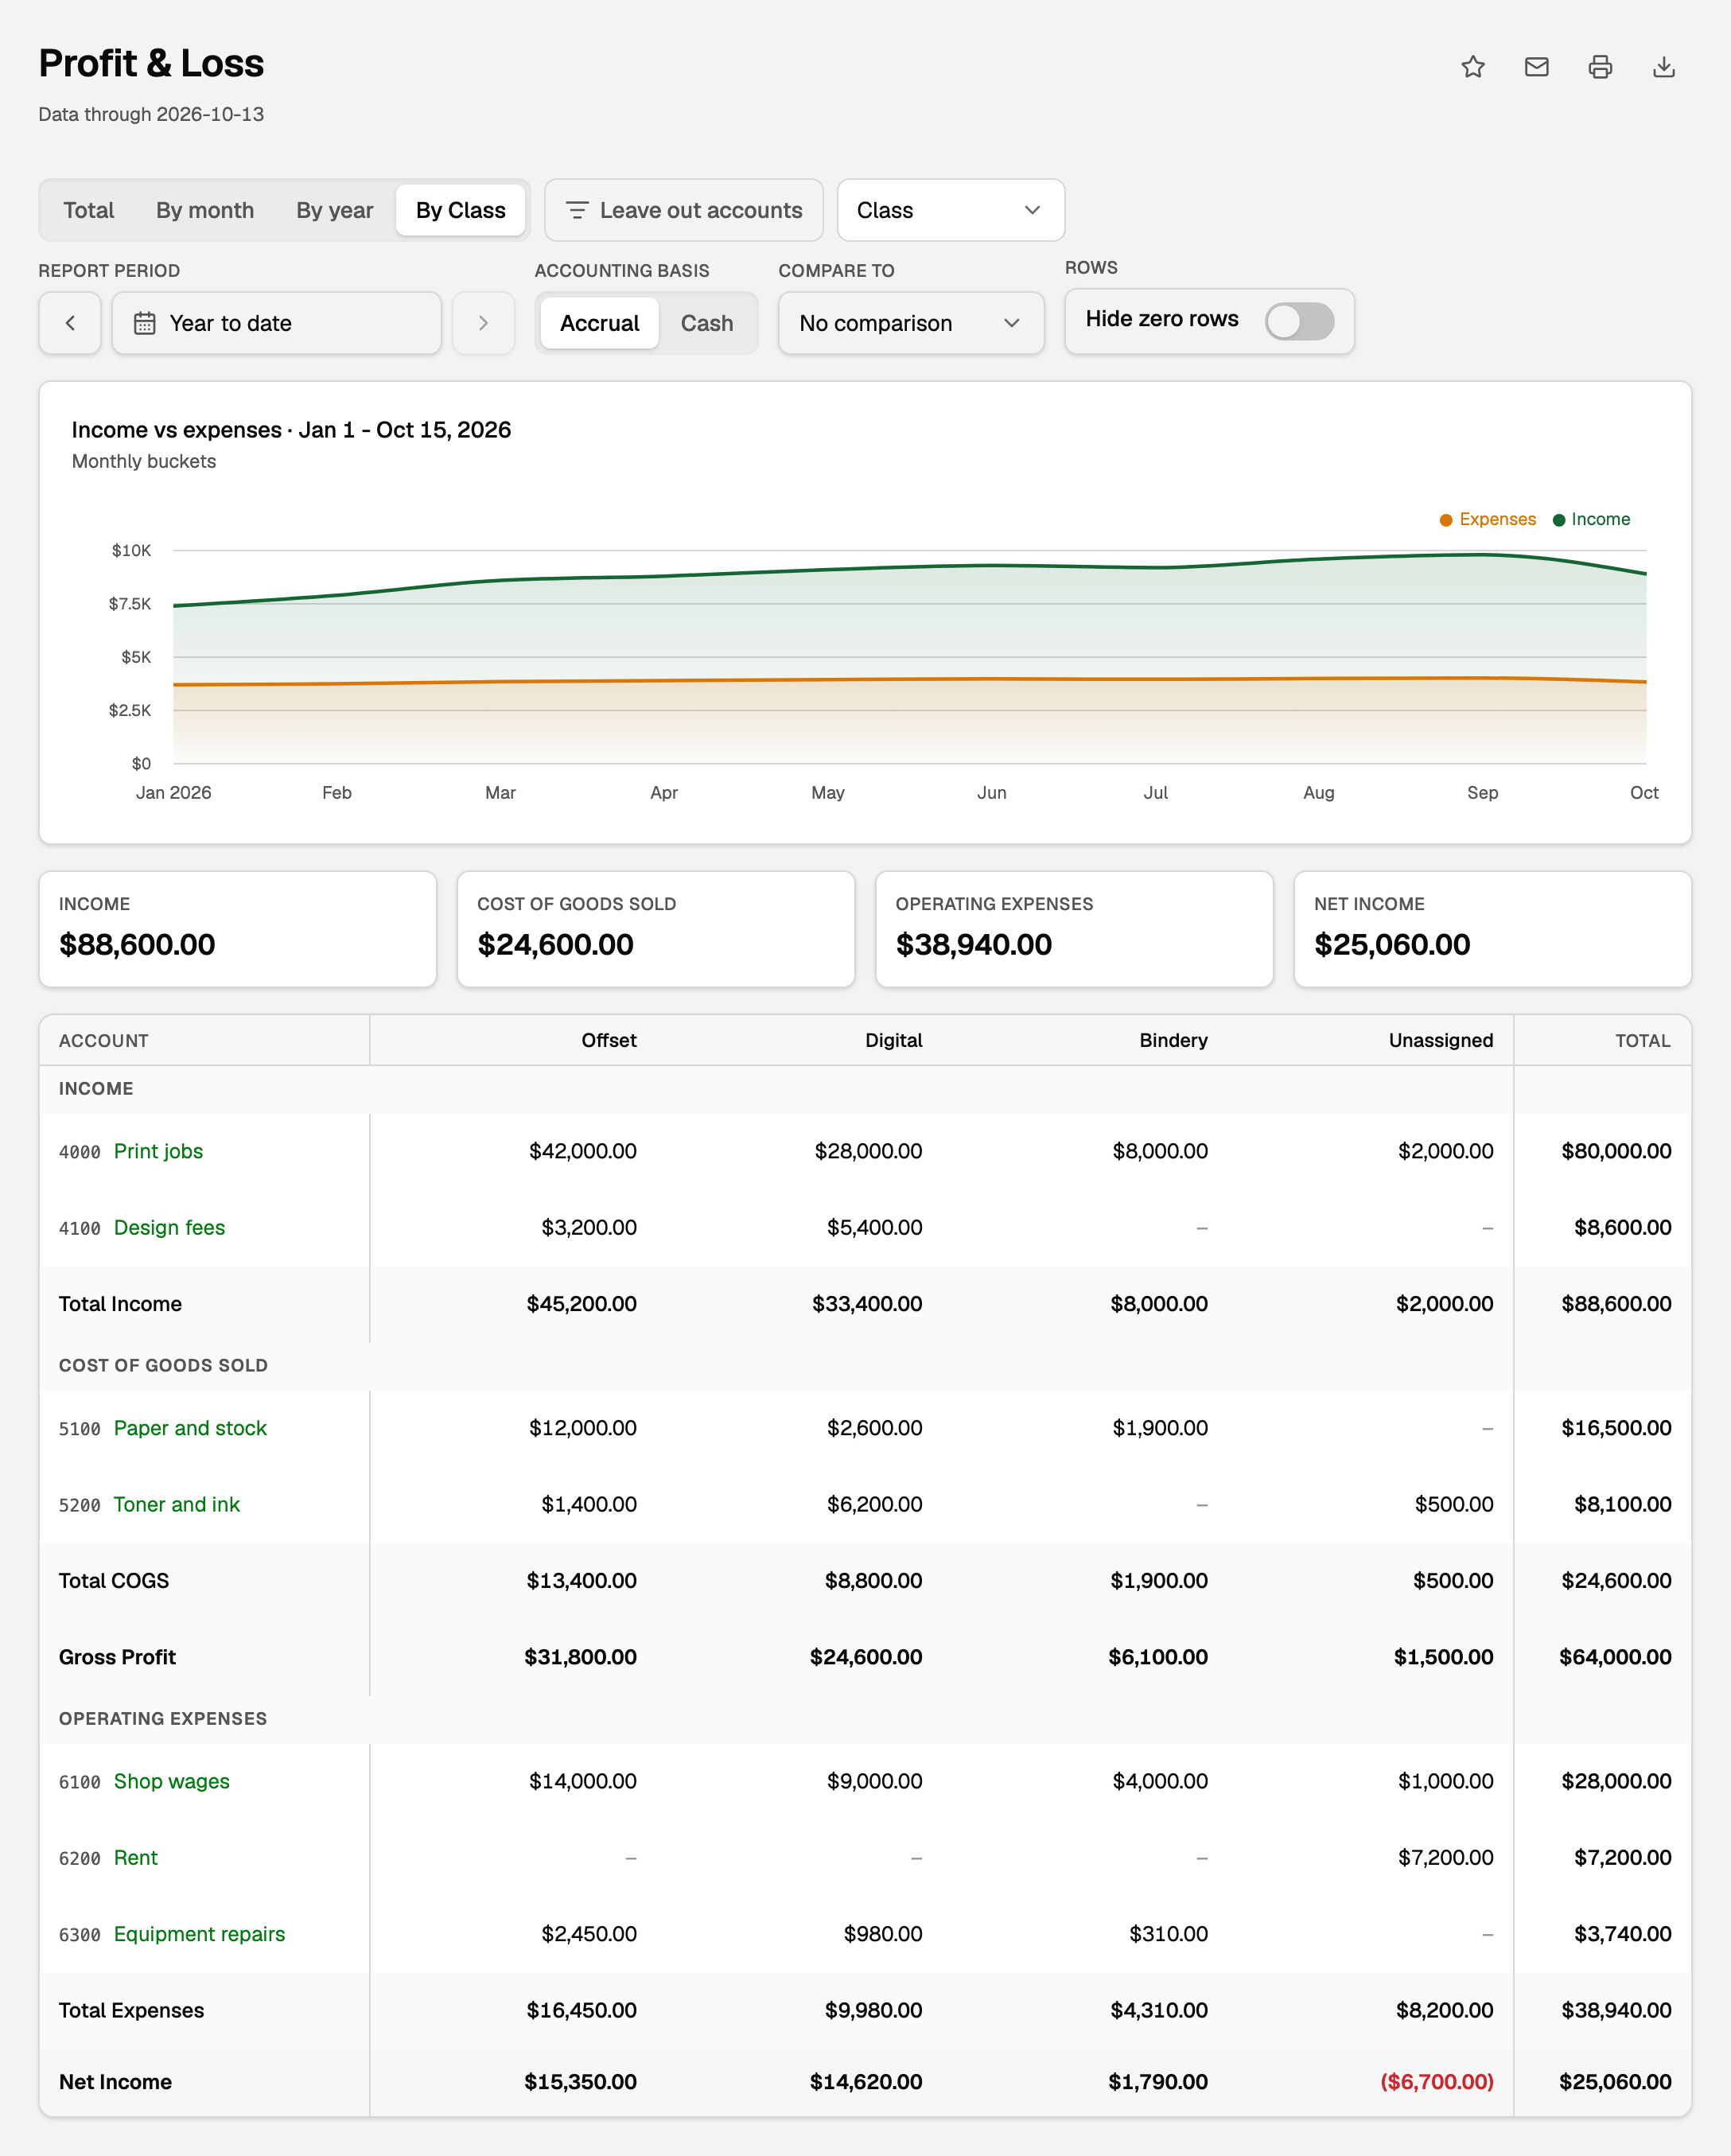
Each class gets its own column, and the Net Income row at the bottom is that class's profit for the period. Money with no class sits in Unassigned. The Total column matches the ordinary report: classes split your totals, they never change them.
Click a figure to see the transactions behind it. Export, the arrow beside the title, downloads the breakdown. More options: Run your financial reports.
If something goes wrong
A class shows in grey and won't change. Hover it, or click it, to see why. It is usually one of these:
- The books are closed through that date. A workspace admin can reopen them; see Close the books for a month or year.
- It is matched to a bill or a recorded entry: set the class there instead. A payment matched to an invoice, or a deposit, takes no class.
- It is split into lines. Set the class on each line instead.
Too much sits in Unassigned. Those transactions have no class yet, or their class was archived: tag them on Transactions, or restore the class under Show archived values. Invoices don't carry a class, so invoiced income stays in Unassigned; to follow a job's income, put its invoices on a project.
Class appears twice after a QuickBooks import. If you already had a dimension of your own, such as Classes, the import makes its own Class rather than merge the two. Archive the one you don't want with the archive icon (a box) on its row. Archiving deletes nothing: Show archived at the bottom of the Dimensions section, then Restore, brings it back with its values and tags.
Updated on: 18/10/2026
Thank you!