
Customers, vendors, and products & services
Three lists sit behind your invoices and bills. Search at the top, click a row to open it, and use the button to add one.
Customers
Open All pages in the left sidebar, then click Sales and Customers.
- Click New customer and enter a name. Email and phone are optional.
- Add an email if you send invoices, receipts, statements, or reminders. Statements and reminders skip a customer who has none.
- Click the customer, then Edit, and set Payment terms. That fills the due date on new invoices. See "Payment terms: set them once per customer or vendor".
If Terms is empty after a QuickBooks import, see "Fill missing payment terms from QuickBooks".
Vendors
Open All pages in the left sidebar, then click Purchases and Vendors.
Click New vendor and enter a name. Vendors are who your bills and expenses are paid to.
The 1099 column is the year-end view. A vendor marked for 1099 tracking reads W-9 needed until you have both their tax ID and their signed W-9, then W-9 on file.
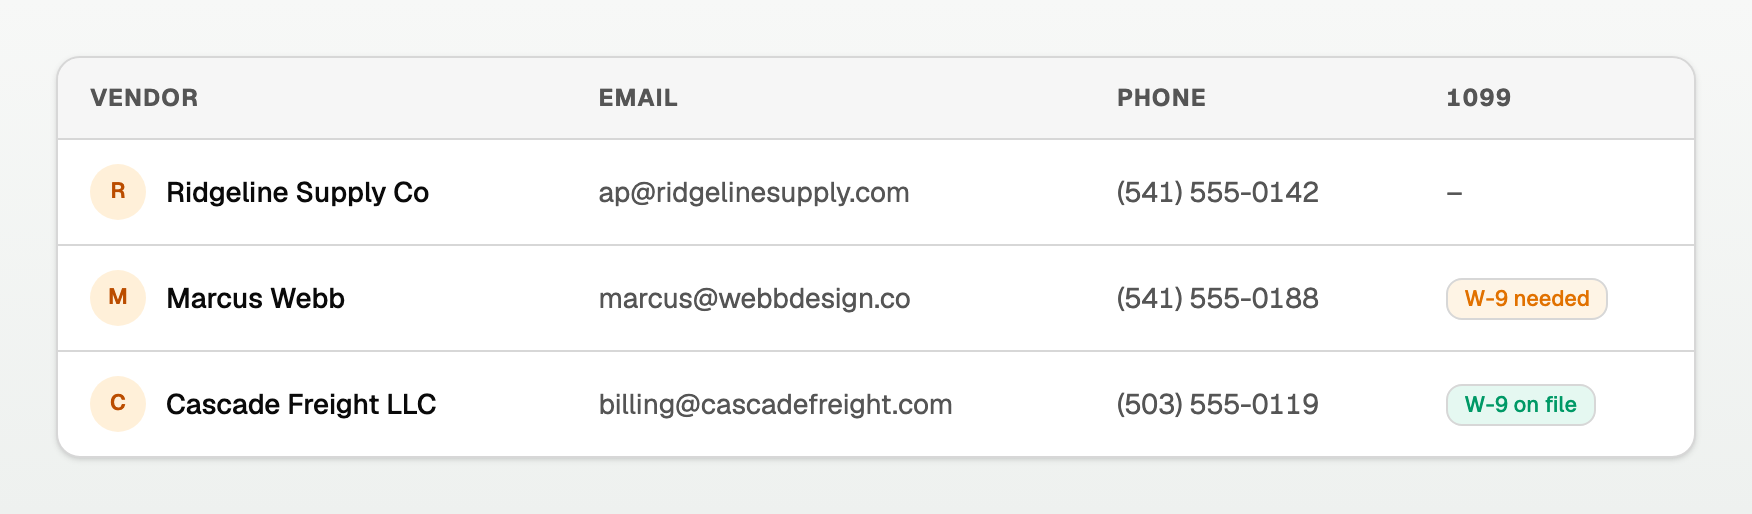
Click the vendor, then Edit, then Tax, payments & accounting, and set Payment terms. The page shows it as Terms, and it fills the due date on new bills. If Terms is empty after a QuickBooks import, see "Fill missing payment terms from QuickBooks".
Products & services
Open All pages in the left sidebar, then click Sales and Products & services. The same page is also under Inventory.
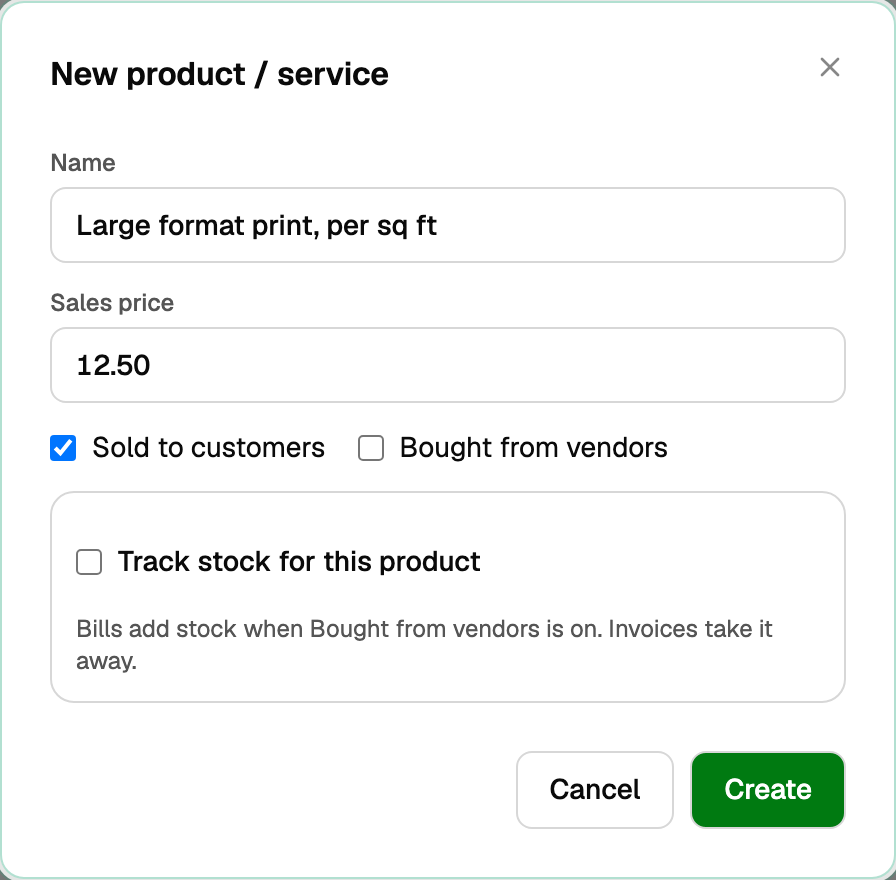
- Click New item.
- Enter a Name and a Sales price.
- Tick Sold to customers, Bought from vendors, or both, then click Create.
- Click Edit and add a Description. It prints under the item's name on invoices and estimates, and picking the item copies it into the line's details note.
Track stock
- On New item, tick Track stock for this product and fill Unit (lb, each, or case).
- Tick Track lots if each delivery should stay separate.
- On Edit, tick Track stock for this product if it is still off, fill Unit, and add a SKU, a Reorder point, or Count it two ways (catch weight) with a Second unit.
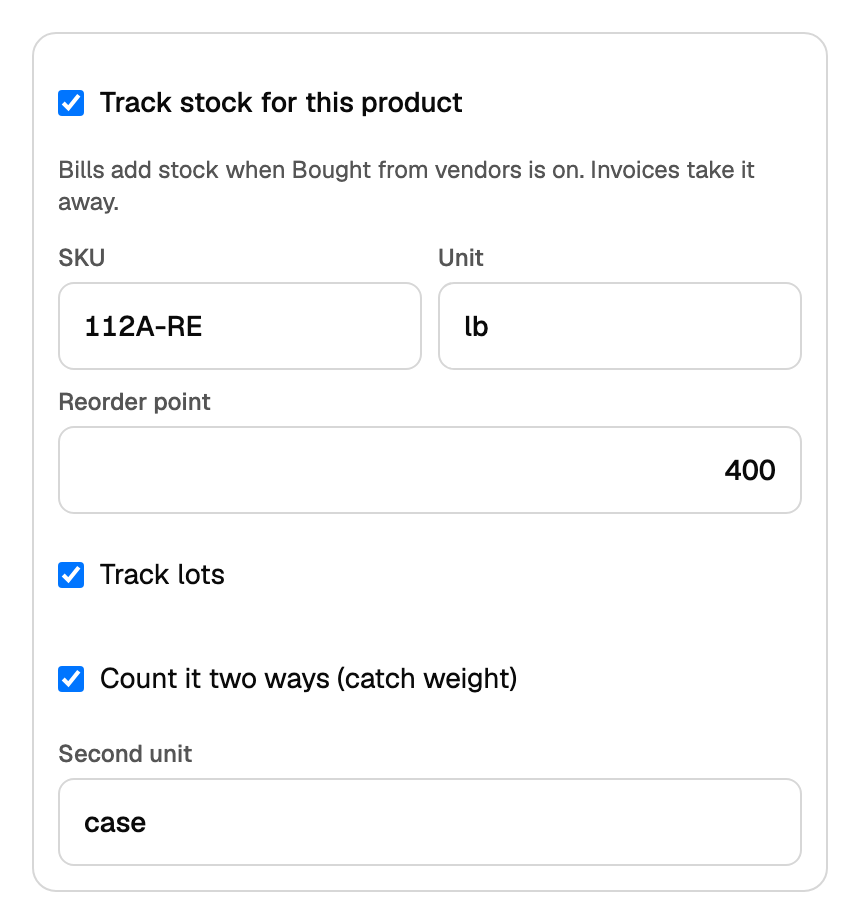
- Bills add stock when Bought from vendors is on. Invoices take it away.
- A product marked Sold to customers appears on a new invoice, including one that tracks lots. Choosing the lots is in "Sell inventory and post cost of goods sold".
- Counts, lots, and the count sheet are in "Track stock quantities". Open All pages in the left sidebar, then click Inventory and Products & stock. Below the reorder point, the row reads Low.
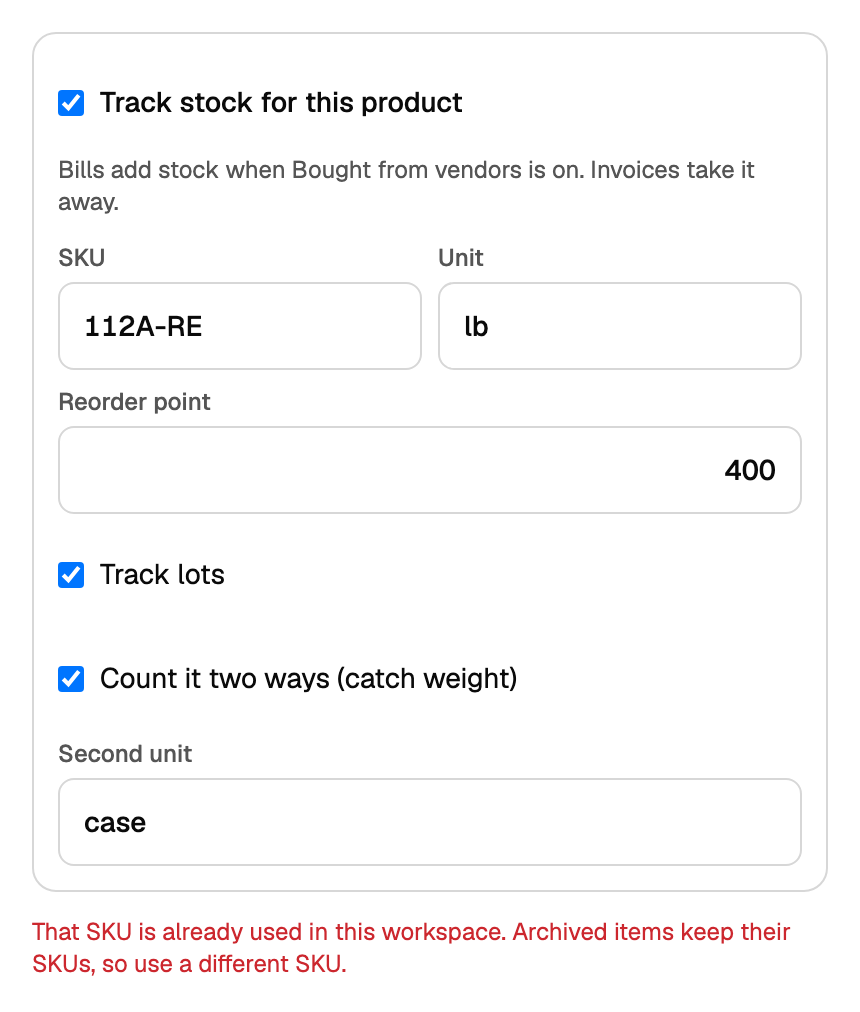
A SKU can be used only once, including on an archived item. Reusing one keeps Edit item open and says "That SKU is already used in this workspace."
Archive and restore
- Open the item and click Archive, then Archive item. It leaves the list. Invoices and bills that already use it keep the line.
- If stock is still on hand, BooksGPT says "This product cannot be archived while it has stock on hand." Bring on hand to zero, then try again. See "Track stock quantities".
- On a Bill, the line shows Archived, and Bought from vendors off when that box is off. Click Open item. The list hides archived items, so this is how you open one again.
- Click Restore. If an active item already uses the name, BooksGPT says "An active product or service already uses this name." Click Edit, rename this item, click Save changes, then Restore.
- If Bought from vendors is off, click Edit, tick it, and click Save changes.
- A Bill will not add the product, and will not post a line that receives it into stock, while the product is archived or Bought from vendors is off. A line already on the Bill stays.
Updated on: 05/10/2026
Thank you!