
Build and edit your chart of accounts
Your chart of accounts is the list of buckets every dollar in your books is sorted into. Each account is one of five kinds:
- Income: money you earn, such as sales or service fees.
- Expenses: money you spend to run the business, such as rent or supplies.
- Assets: what the business owns, such as bank accounts, equipment and money customers owe you.
- Liabilities: what the business owes, such as credit cards, loans and unpaid bills.
- Equity: what belongs to the owners, such as money you put in or took out.
Income and expenses make up your profit and loss report. Assets, liabilities and equity make up your balance sheet. A good chart is short: one account for each line you want to see on those reports, not one per vendor.
A new workspace starts with a starter chart, so most businesses only rename a few accounts and add what is missing.
Open your chart of accounts
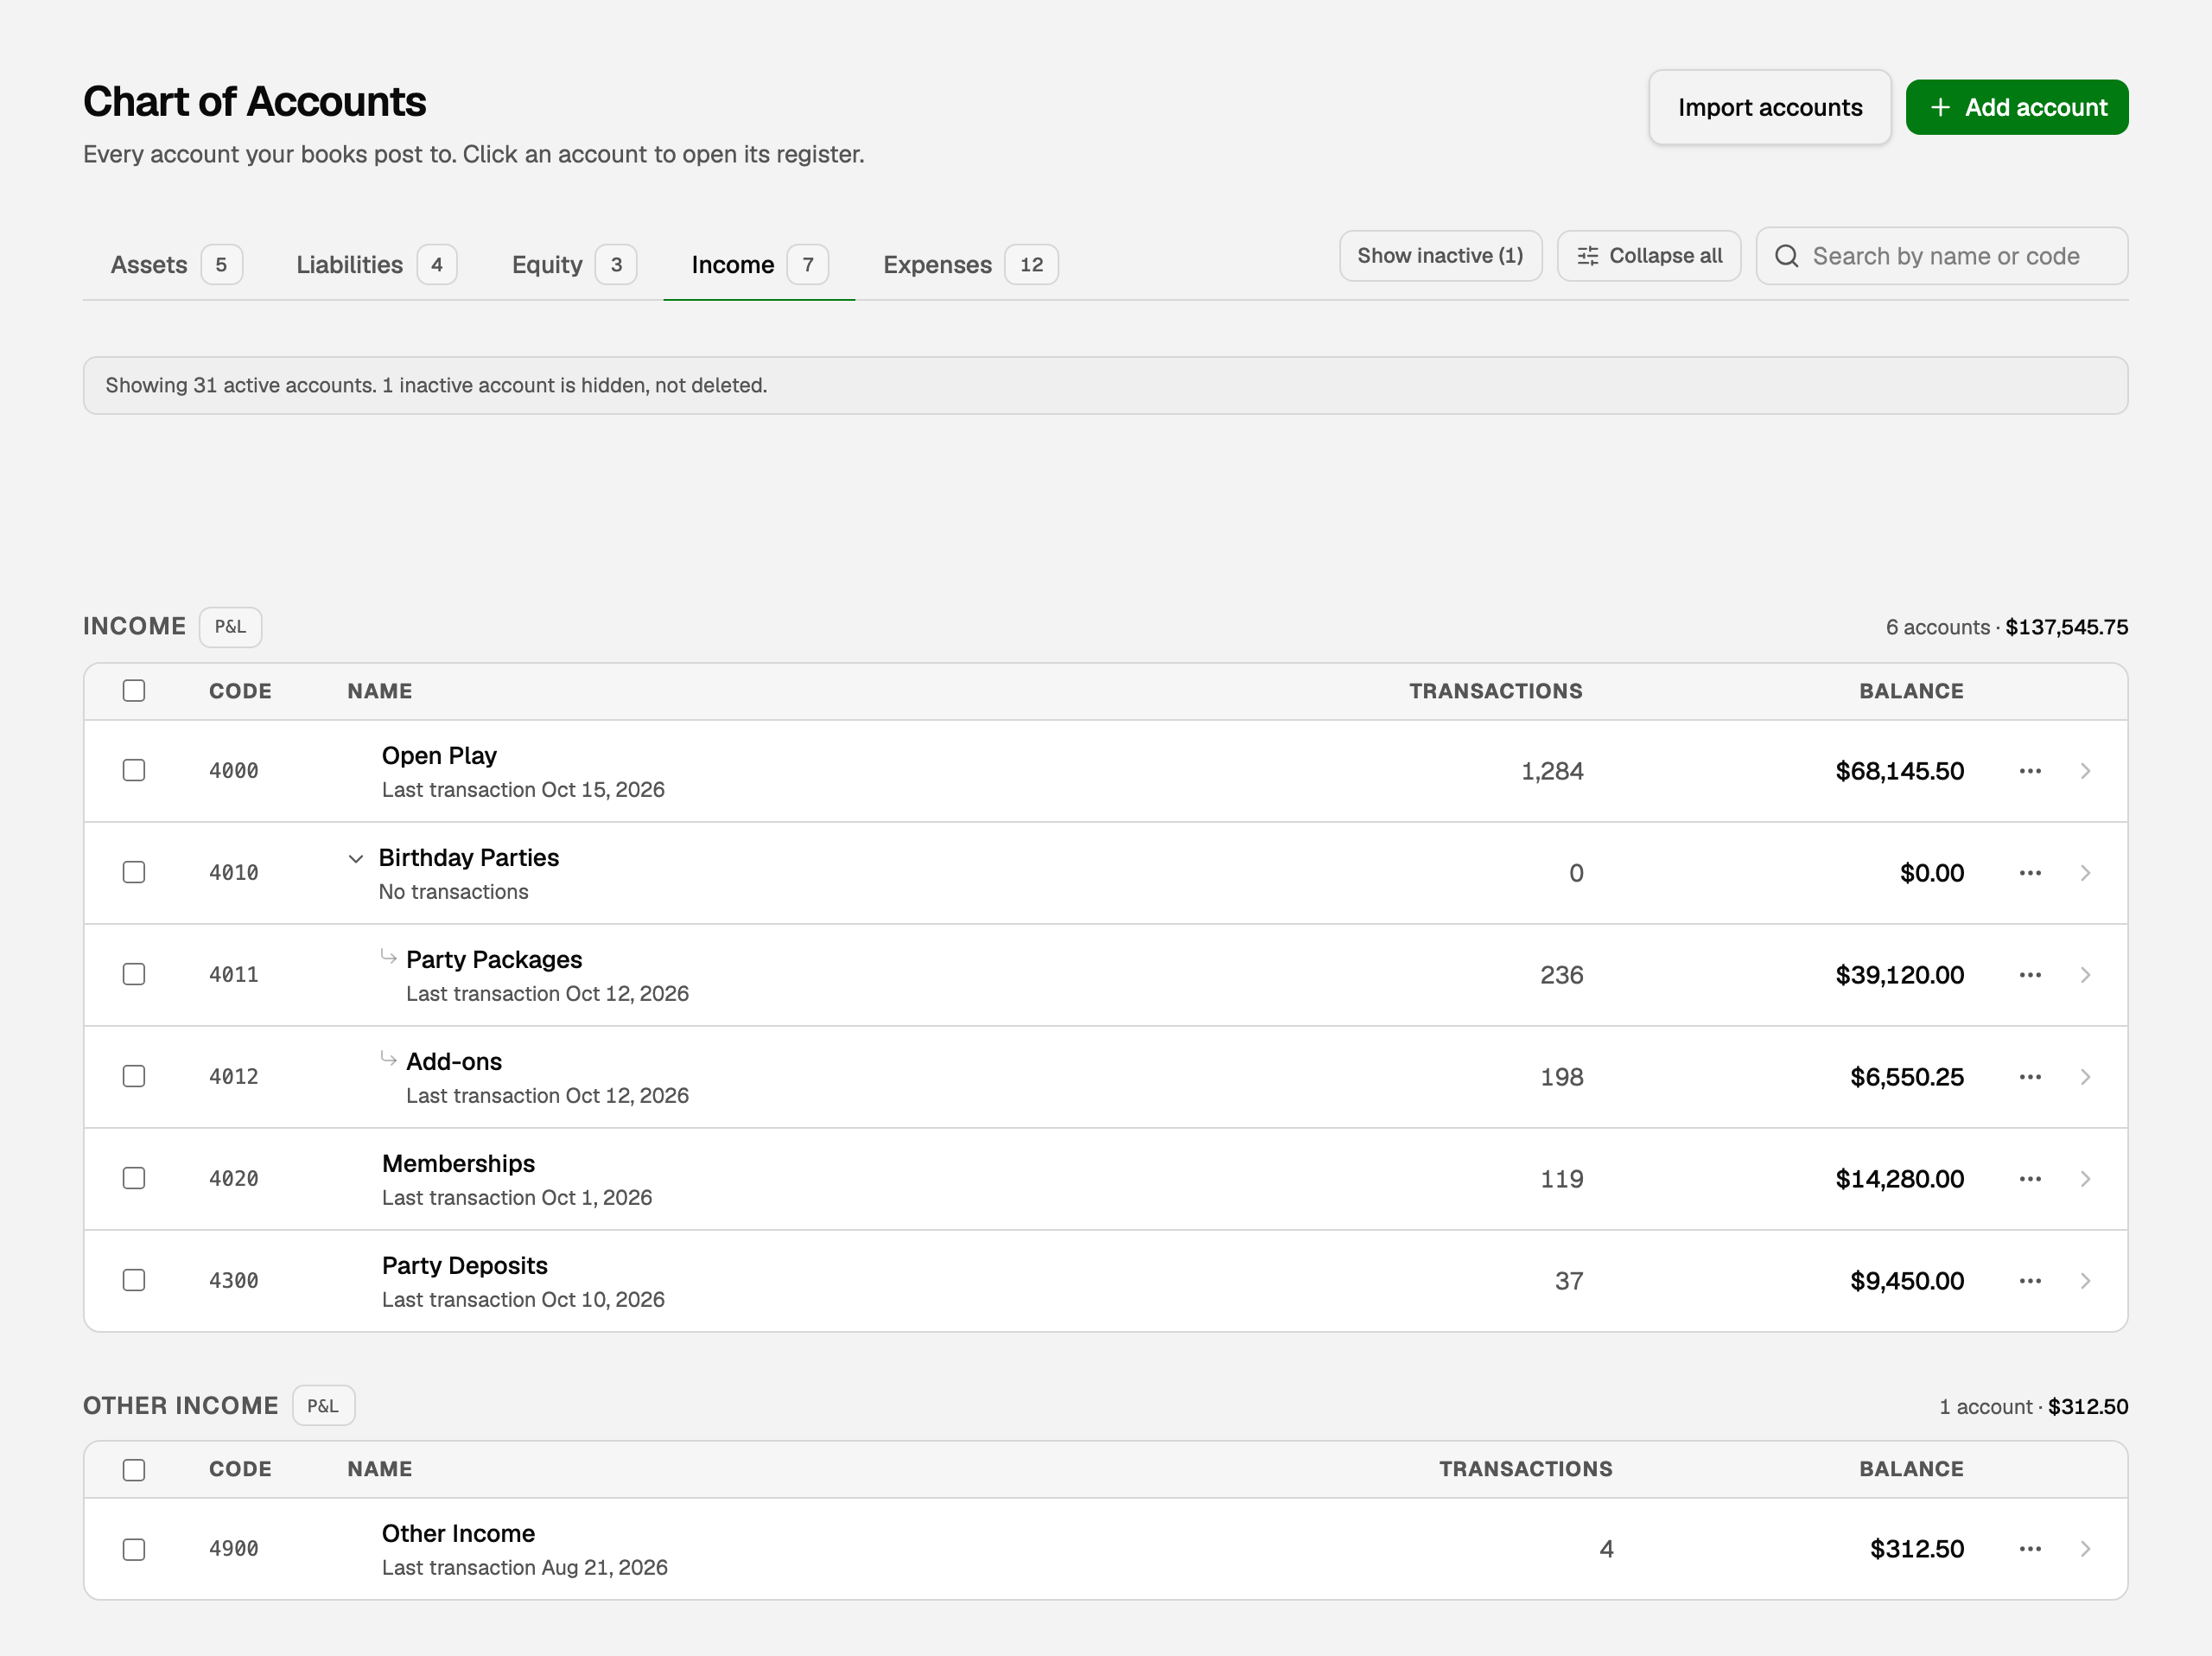
Open All pages in the left sidebar, then click Accounting and Chart of accounts.
- The tabs are the five kinds: Assets, Liabilities, Equity, Income and Expenses.
- Click a row to open the account's register: every transaction in it, with a running balance.
Add an account
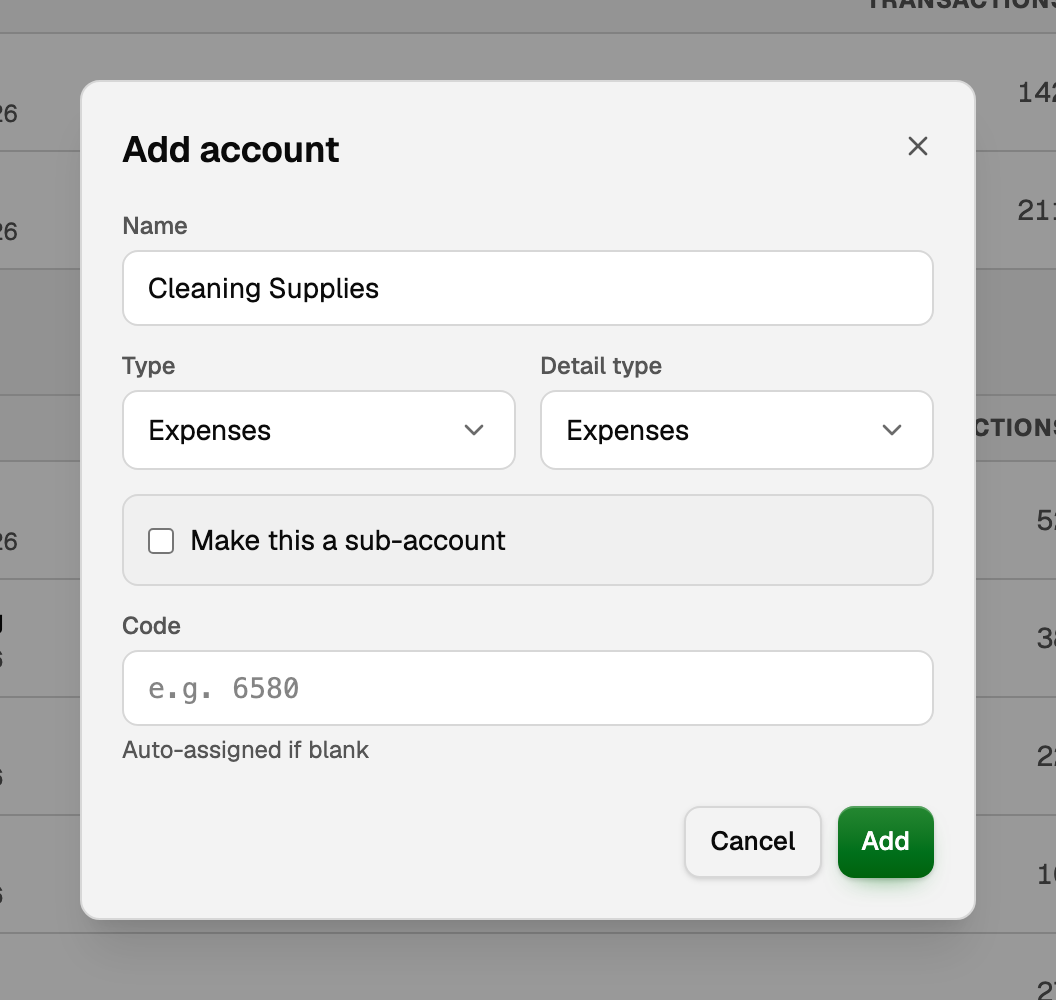
- Click Add account.
- Type a Name, such as Cleaning Supplies.
- Pick a Type, then a Detail type. The detail type decides where the account sits on your reports, so pick the closest match.
- To put it under another account, tick Make this a sub-account and choose the parent.
- Leave Code blank to have one assigned.
- Click Add.
While you categorize a transaction, New category in the category picker adds one too.
A parent account rolls up its sub-accounts, and reports nest them under it with a total. See How sub-accounts show on Profit & loss and the Balance sheet.
Rename, retire or merge an account
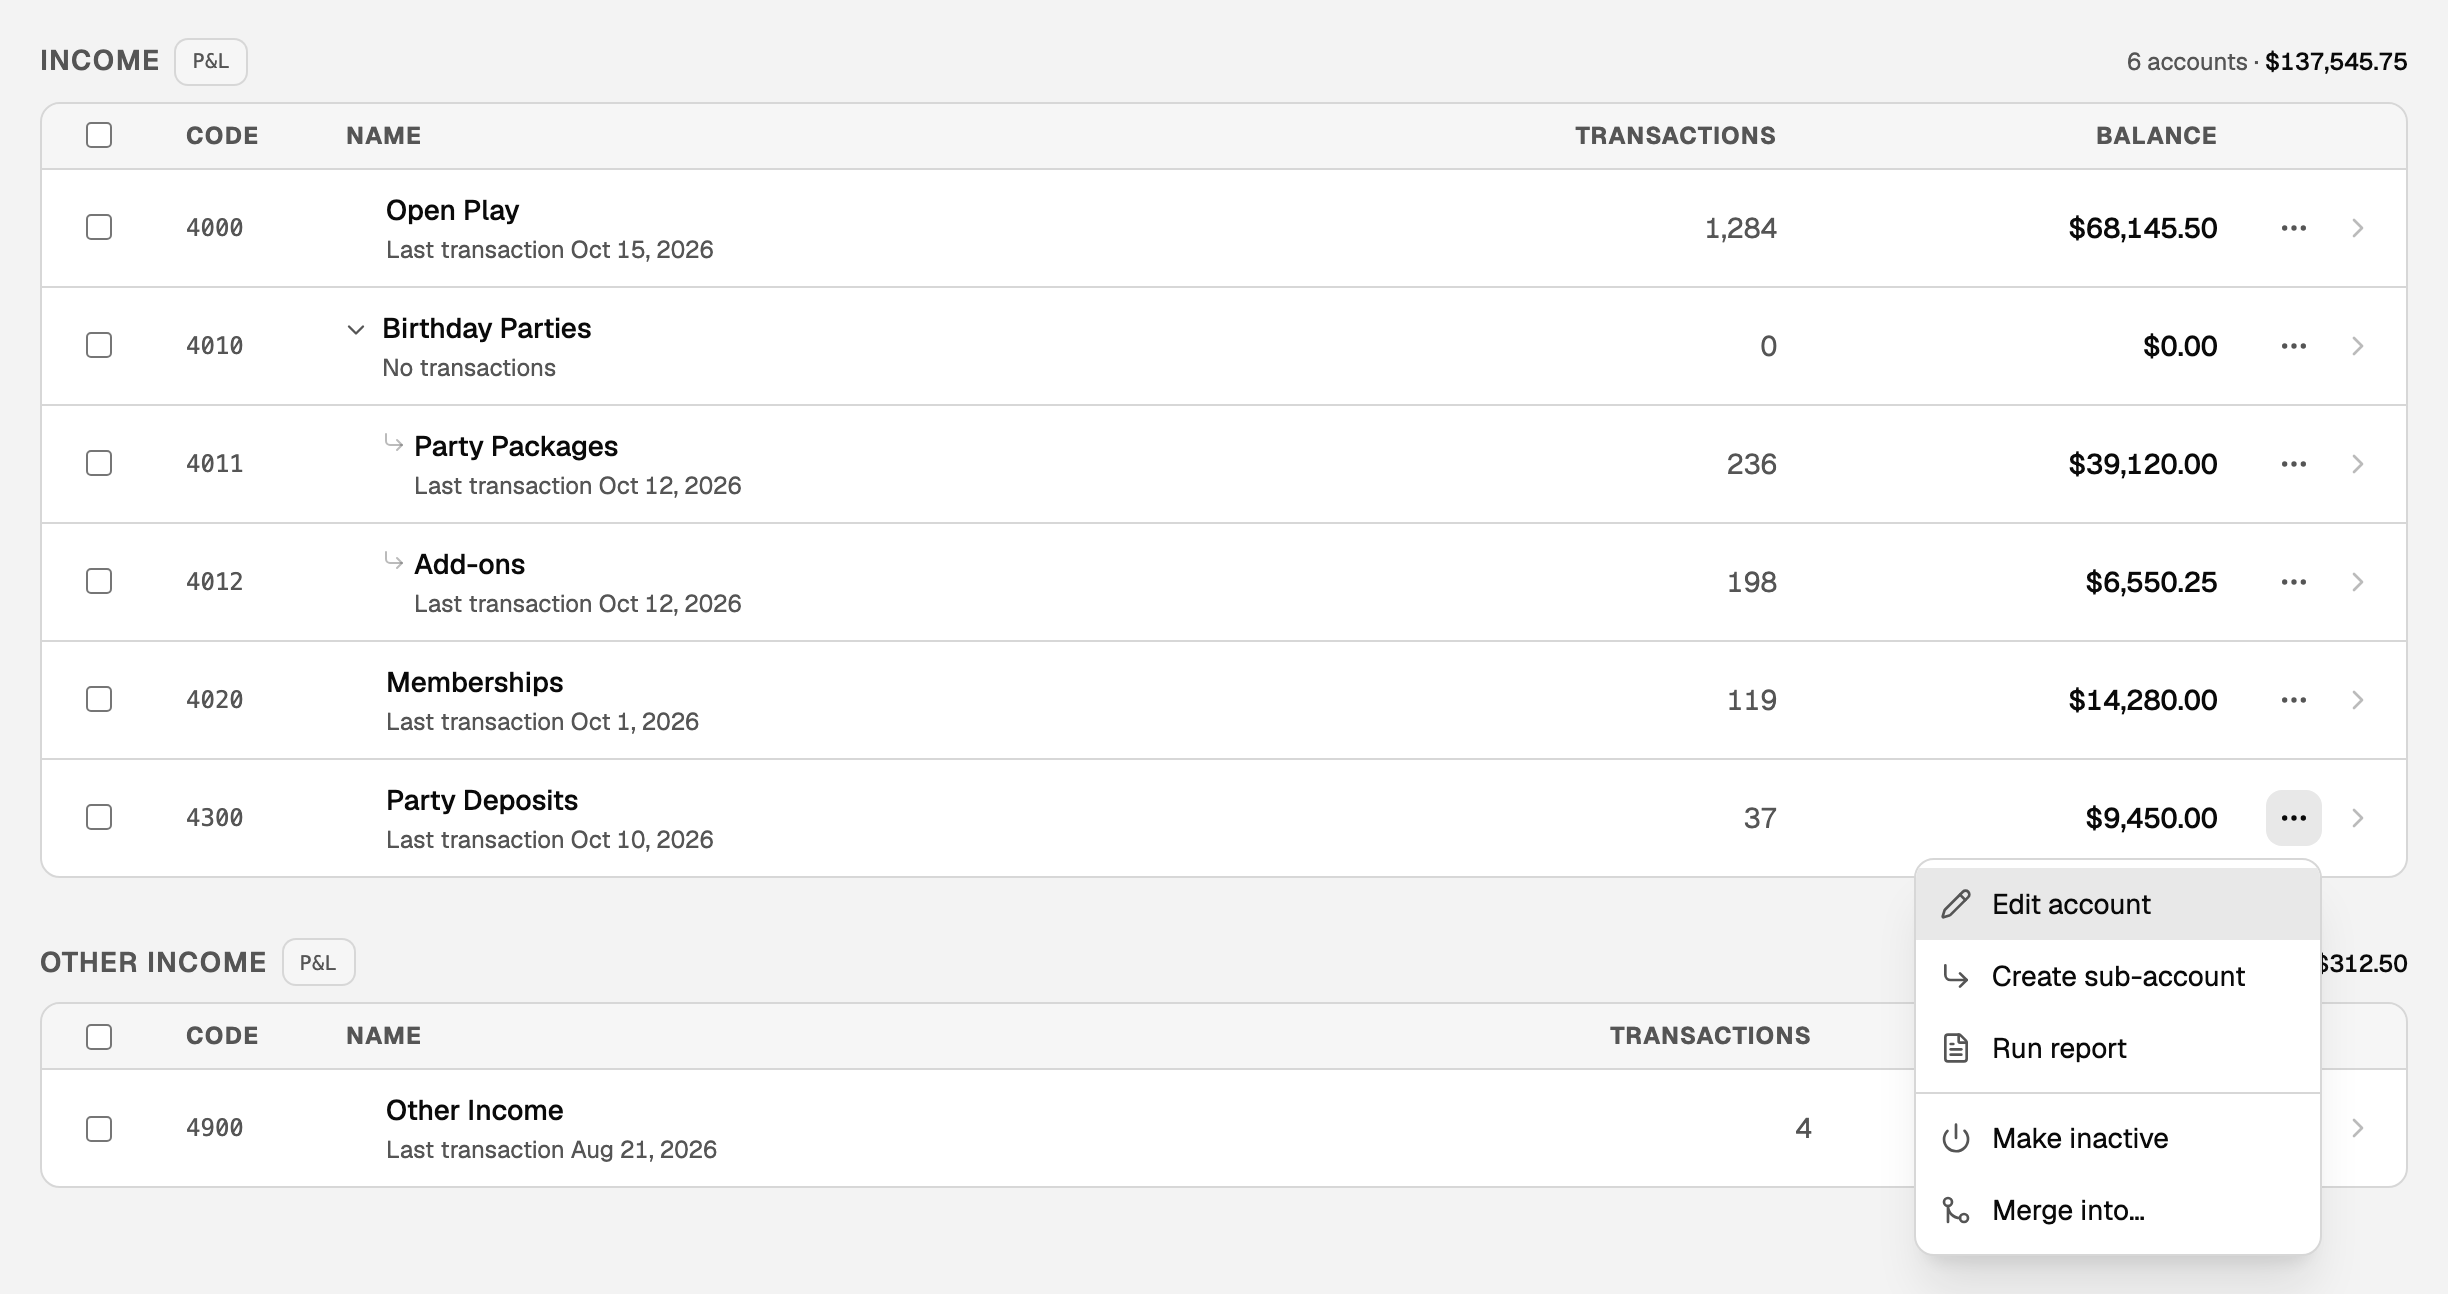
Click the ... button at the end of a row:
- Edit account changes the name, code, description, parent or type.
- Create sub-account adds a new account under this one.
- Make inactive hides an account you no longer use, along with its sub-accounts. Nothing is deleted and your reports do not change. First disconnect any bank that feeds it and finish any reconciliation in progress on it. To bring it back, click Show inactive above the chart, then Make active in the row's menu.
- Merge into… combines two accounts that mean the same thing, such as Supplies and Office Supplies. Both need the same type and detail type. Everything posted to this account moves to the one you keep, and this one is retired. Your totals do not change.
A recurring bill that posts automatically to an account stops when you make the account inactive; a merge moves it instead. See Recurring bills.
Only the workspace owner or a bookkeeper can reshape the chart: import accounts, make one inactive, merge, nest, set default classes, or change a type, parent or opening balance. Anyone else who edits the books can still add, rename and renumber accounts.
Change an account's type
Sometimes an account sits on the wrong report. A deposit for a party next month is money you owe the customer until the party happens: a liability, not income. Filed under Income, it makes your profit look bigger than it is.
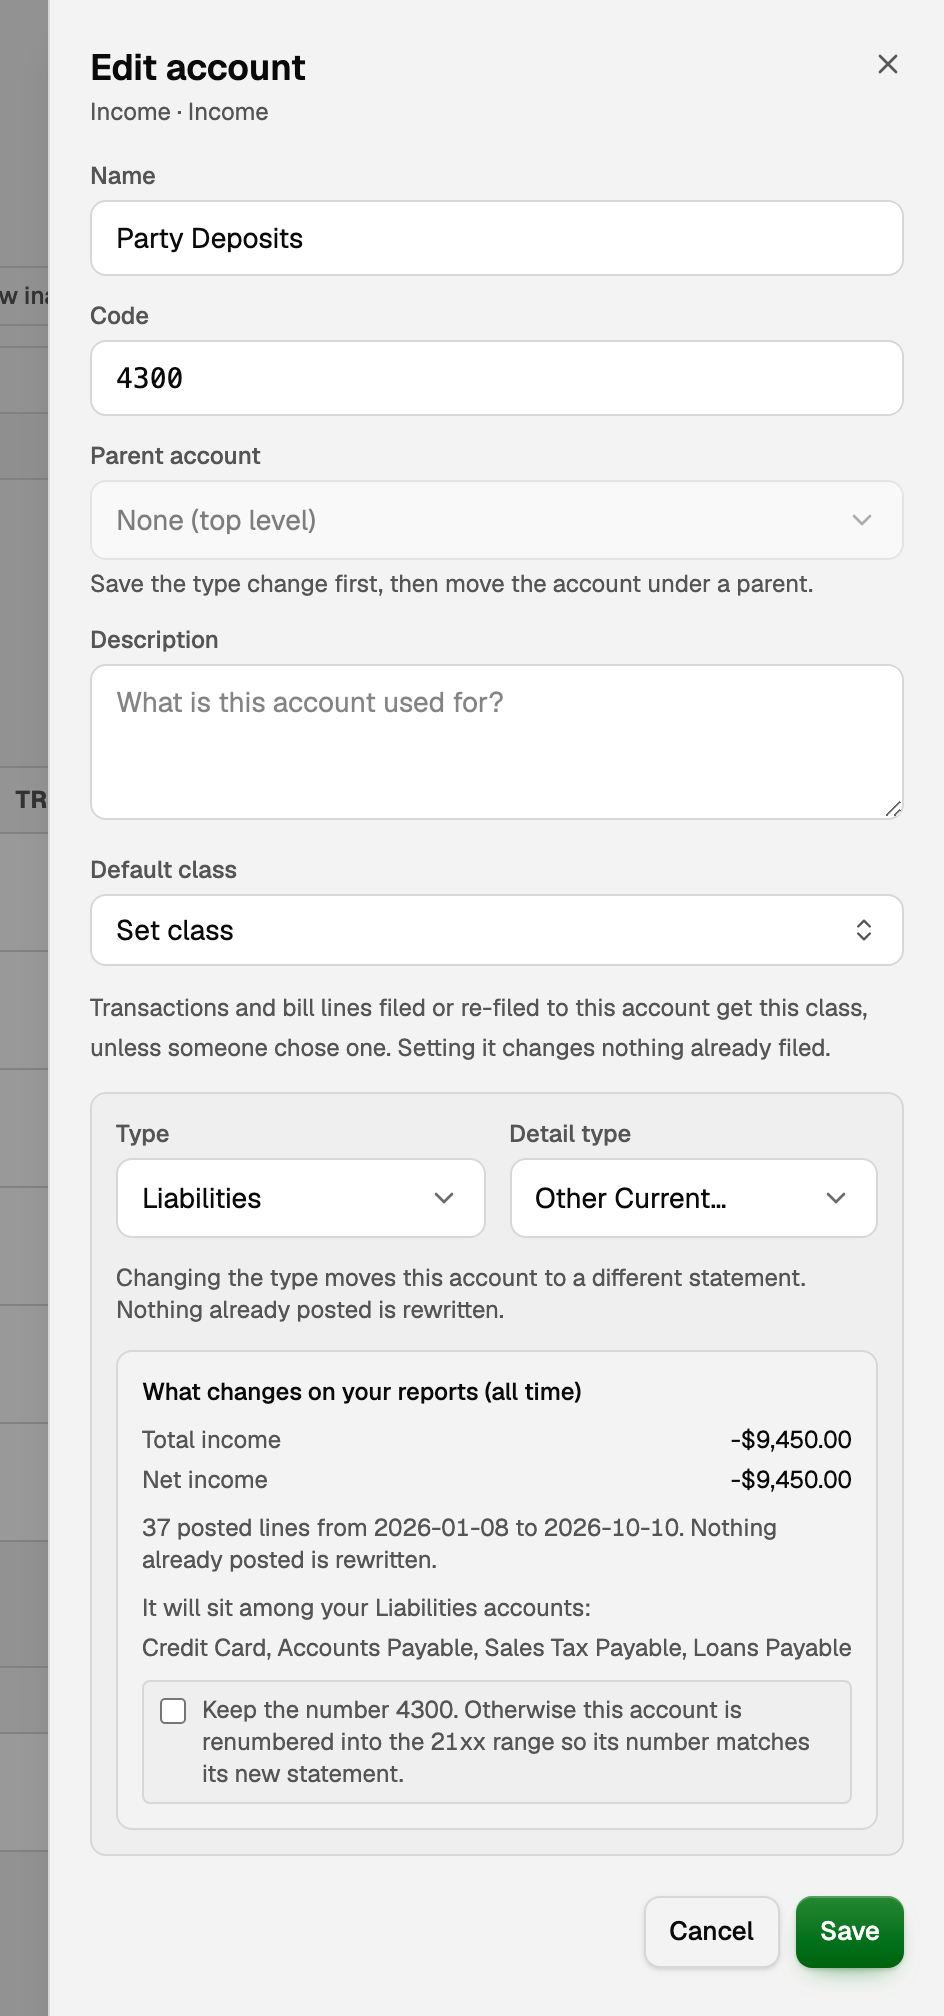
- Click the row's ... button, then Edit account.
- Under Type and Detail type, pick where it belongs, such as Liabilities and Other Current Liabilities.
- Read What changes on your reports (all time): how income, expenses and net income move, and the accounts it will sit beside.
- BooksGPT renumbers the account into the range for its new type. Tick Keep the number to keep its old code.
- Click Save.
If some of its lines fall in a period you closed, tick the box confirming that reports you already issued will change.
Import a chart of accounts from a spreadsheet
Accounts already in a spreadsheet? Import them instead of typing each one.
- On Chart of accounts, click Import accounts. You can also drop the file into the Copilot chat.
- Choose a CSV, TSV or XLSX file, up to 5 MB and 500 accounts.
- In Review chart of accounts, check each row: what your file said, the account BooksGPT will use, and whether it creates a new account or reuses one you have.
- If BooksGPT asks you to choose a type for some accounts, pick one under each.
- Leave Remove unused starter accounts ticked to clear the starter accounts your file replaces. Accounts with activity always stay.
- Click the Import button. Nothing changes until you do.
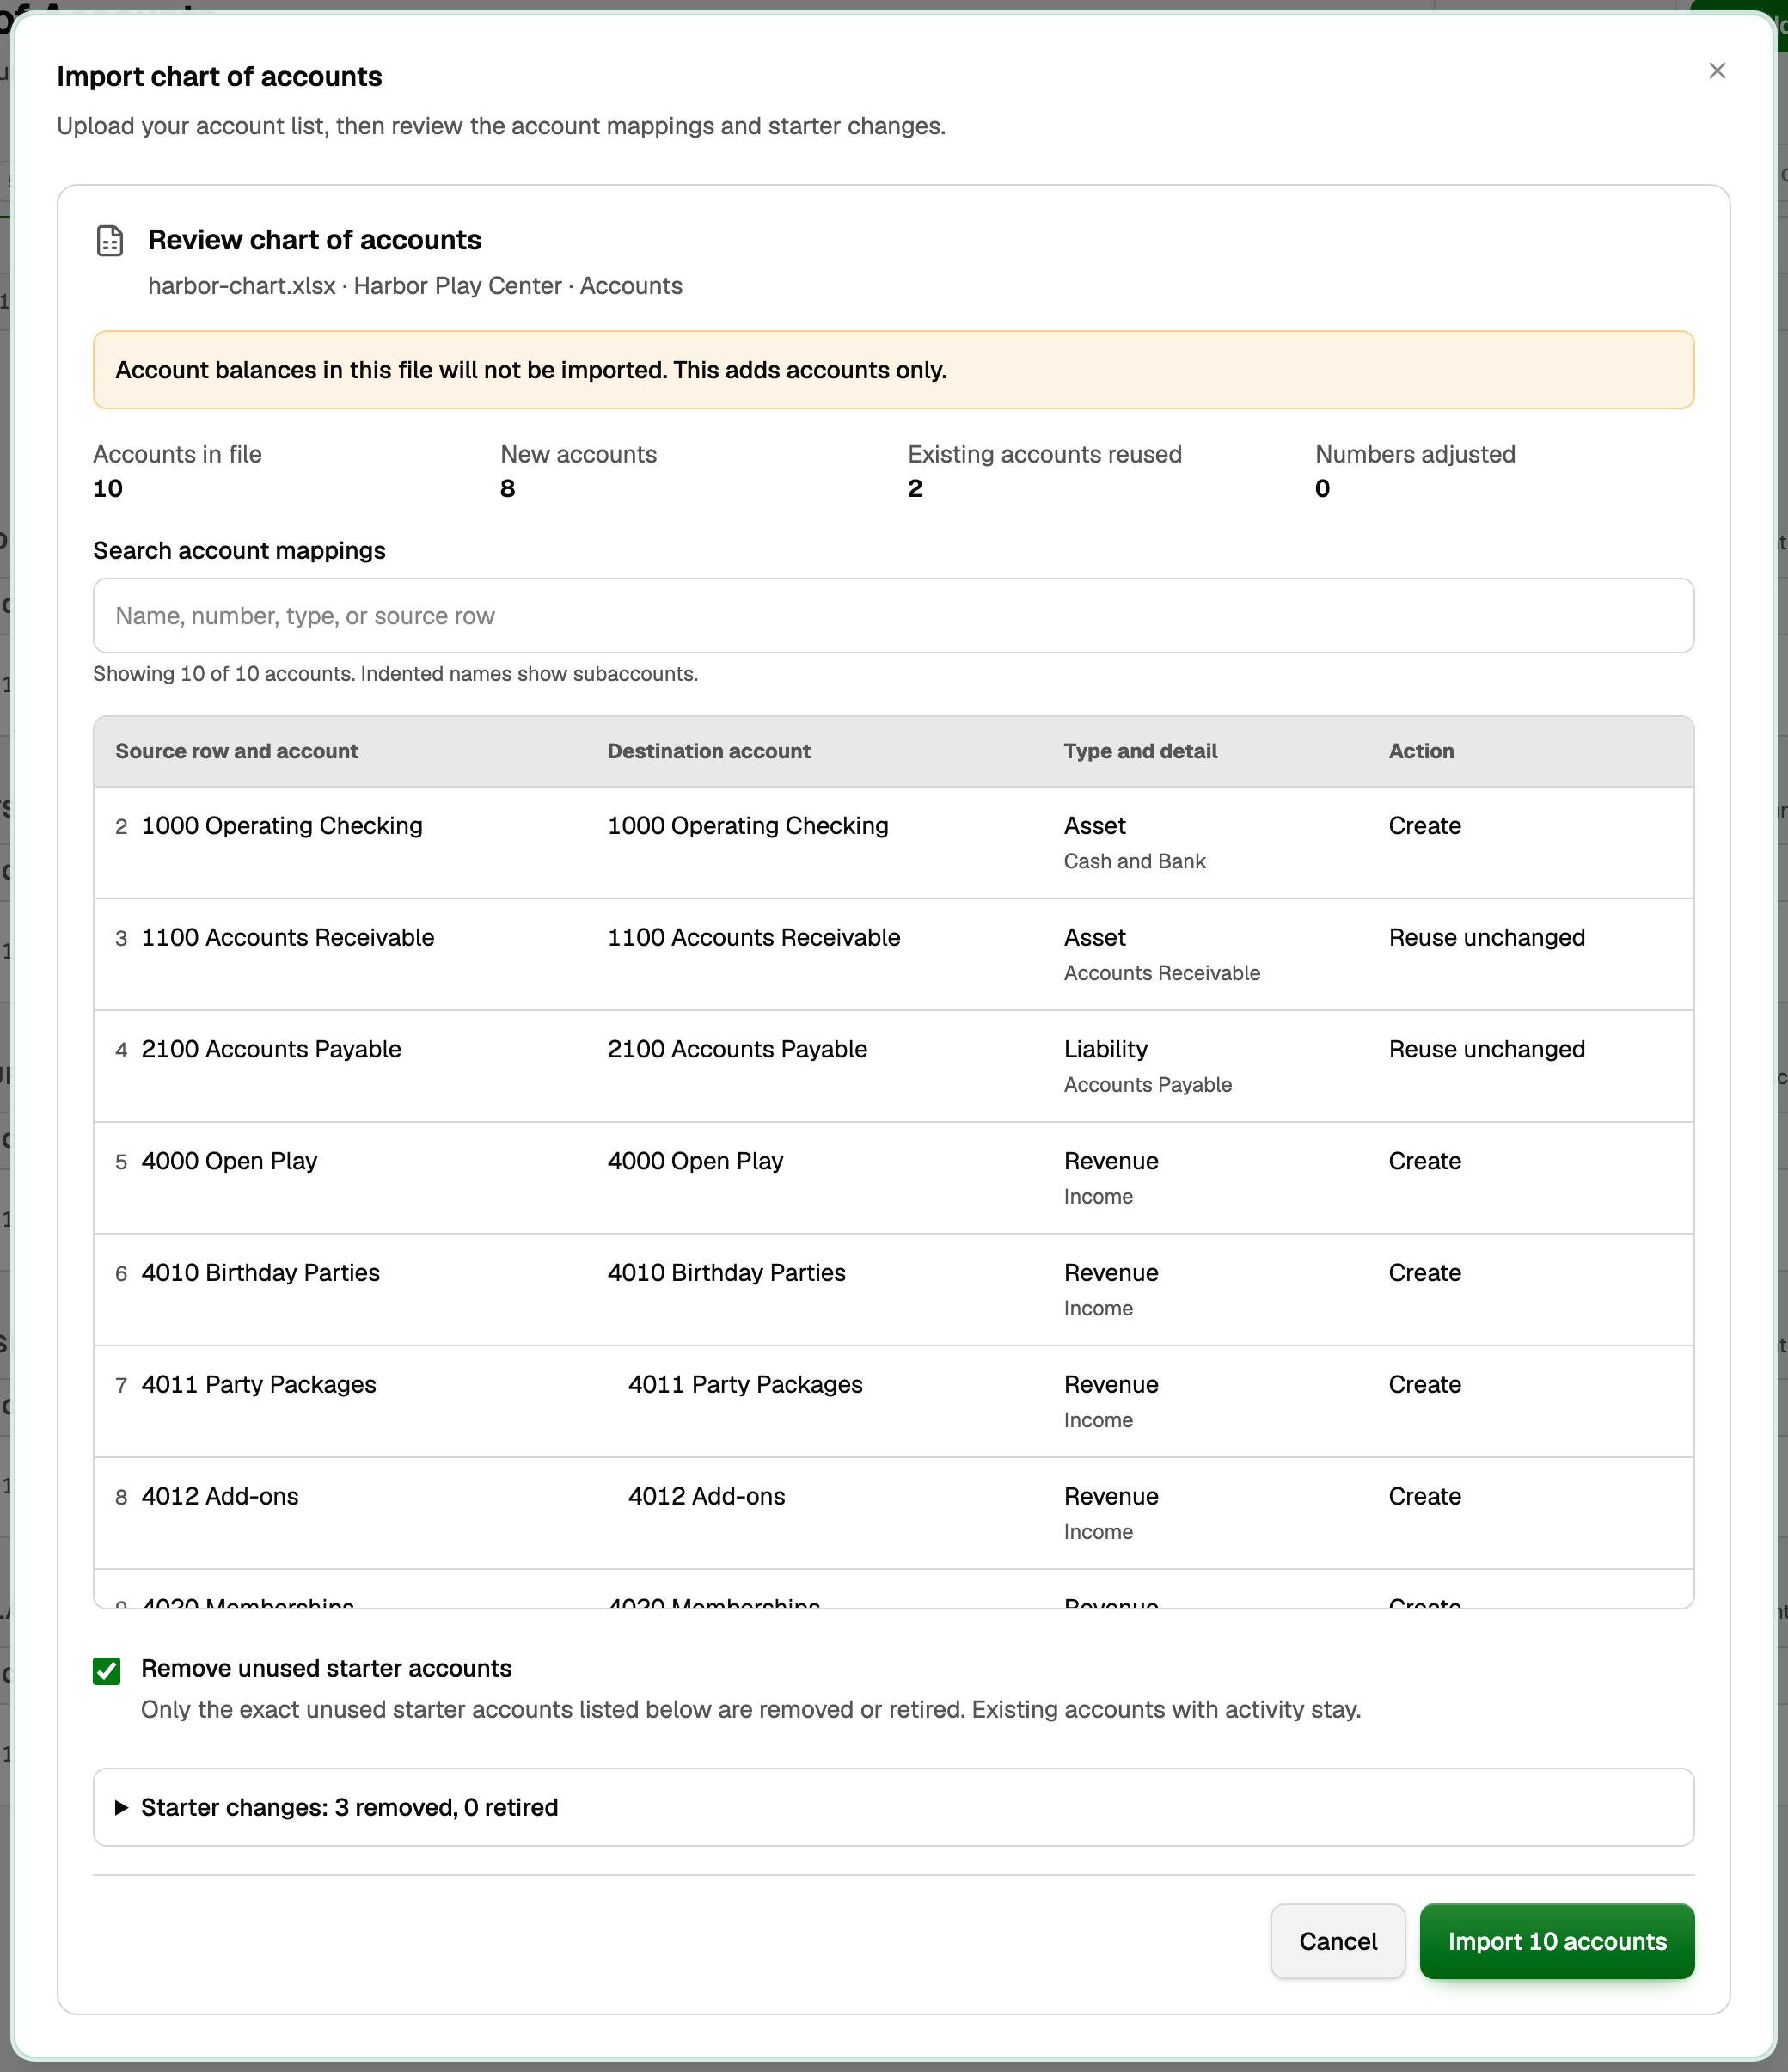
The import adds accounts only. Balances in the file are not imported: enter them as opening balances. Uploading the same file twice adds no duplicate accounts.
Work on many accounts at once
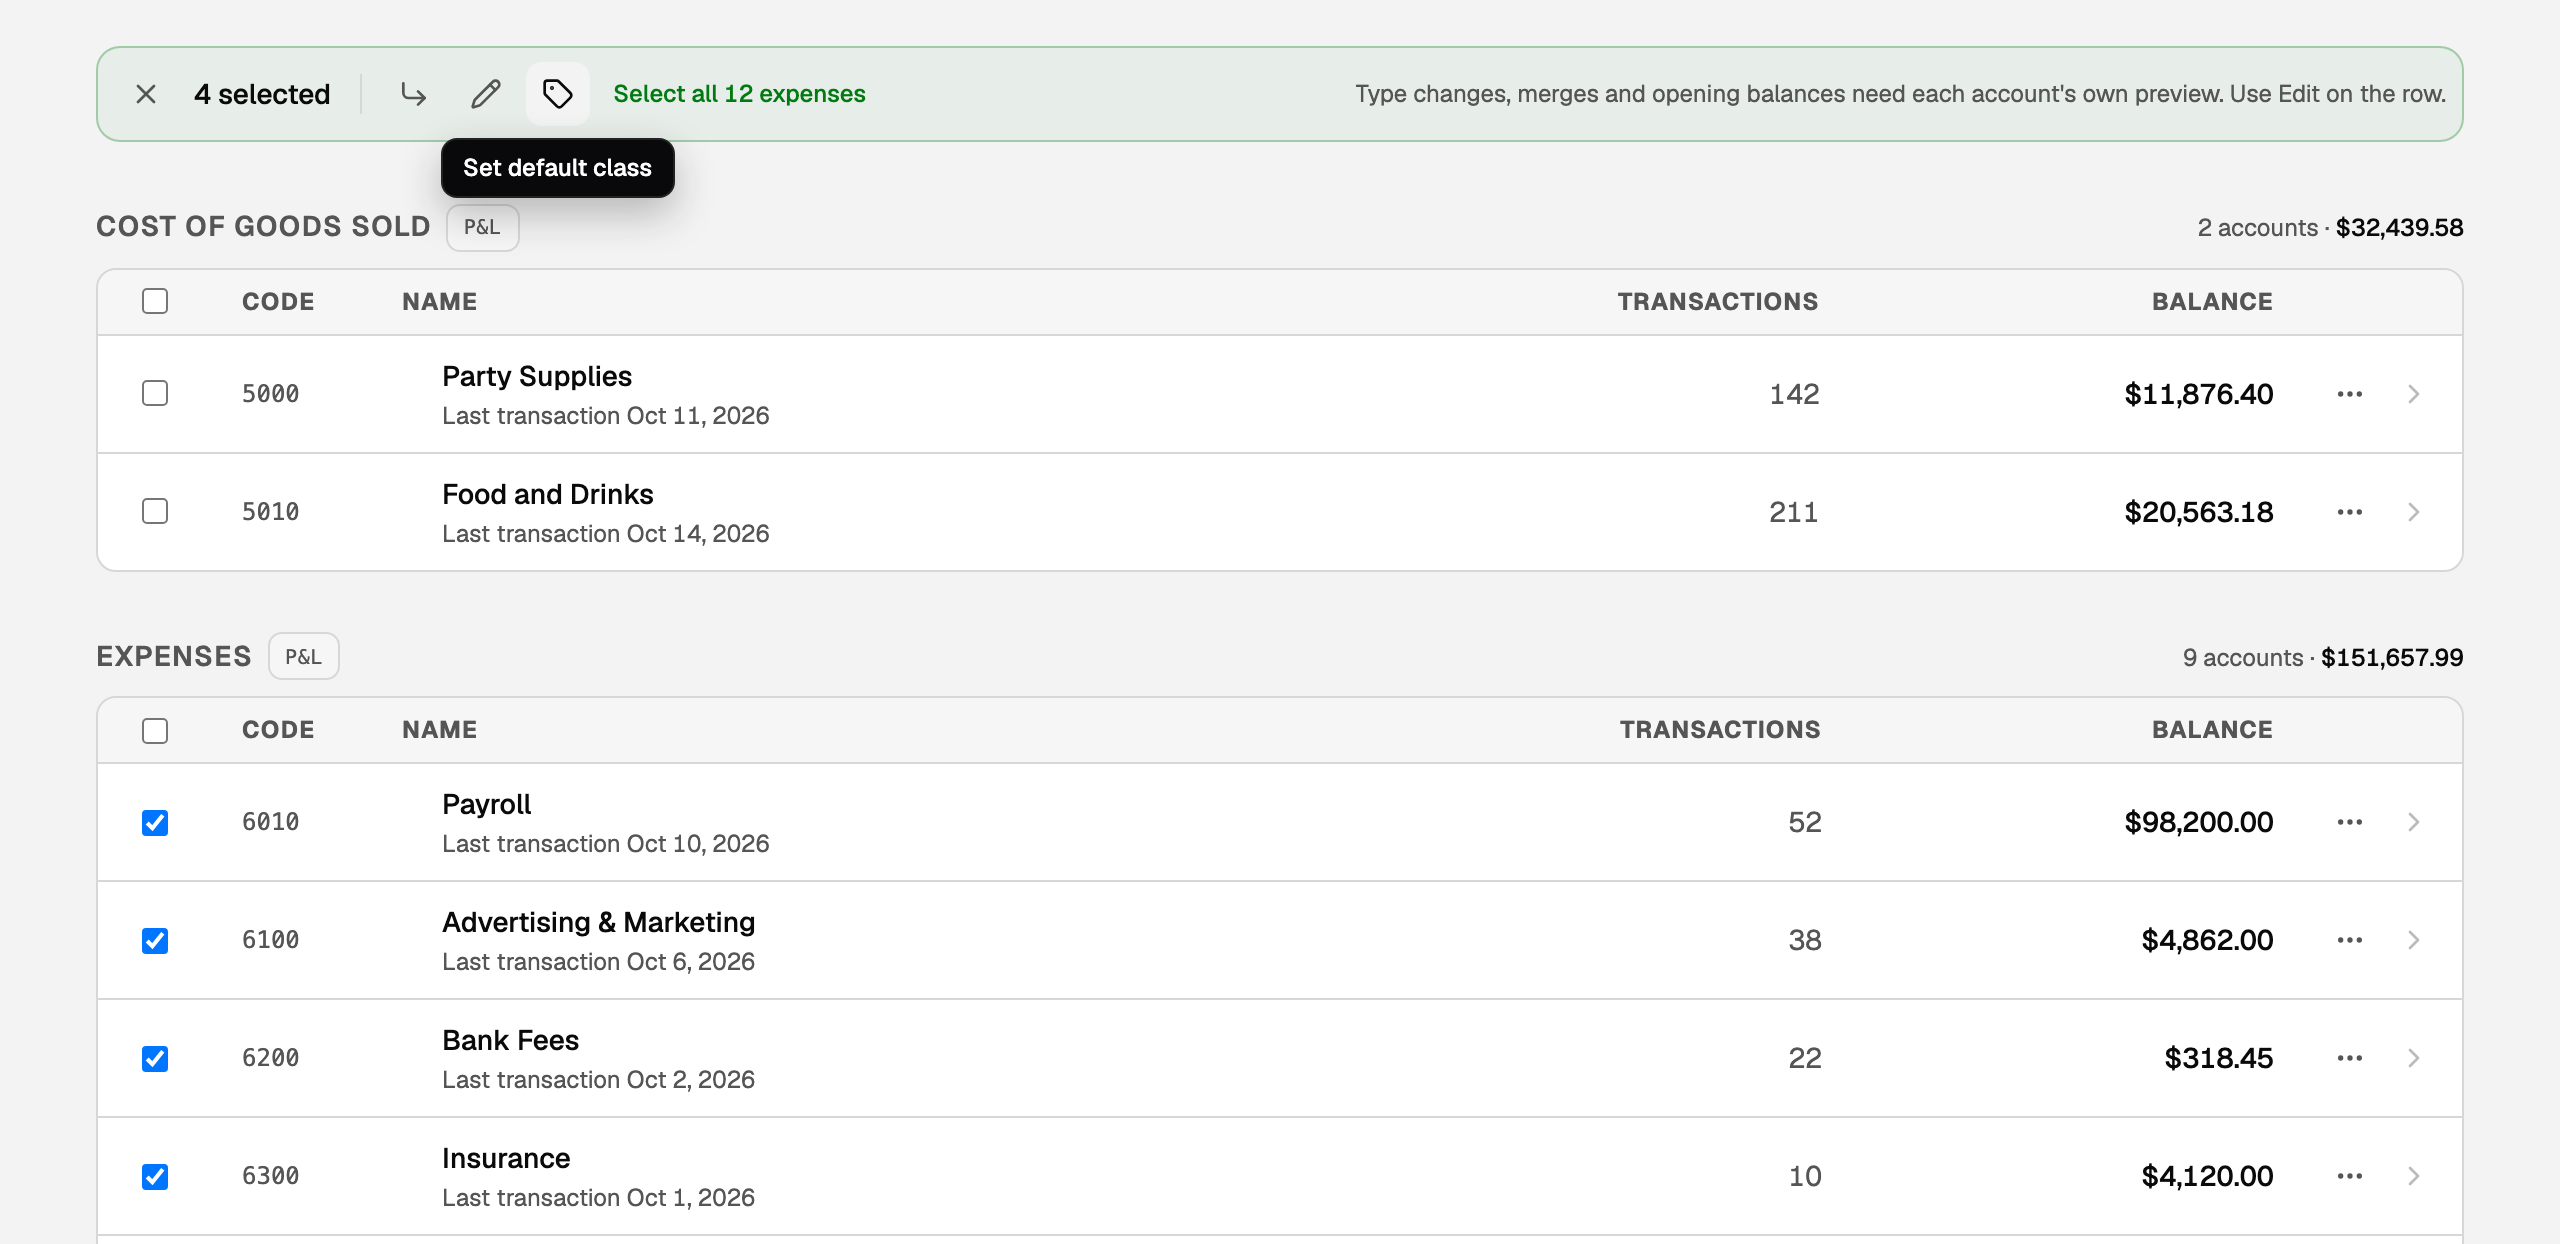
Tick several accounts, or the box in a section's header. Icons appear on the bar above the list; rest the mouse on one to see its name.
- Move under a parent (the arrow) nests the accounts under parents you pick. Balances stay the same.
- Renumber codes (the pencil) gives each account a new code, and can swap two codes.
- Set default class (the tag) appears once you track classes. Transactions filed to these accounts get that class when nobody picked one. See dimensions.
- Select all ticks every active account on the tab.
What your books now say
Every transaction, bill and invoice lands in one of these accounts. Your profit and loss lists the income and expense accounts, and your balance sheet lists the rest, each with its balance. Renaming, renumbering or nesting an account changes how reports read, never the amounts.
If something goes wrong
- The starter Checking, Savings or Credit Card account disappeared. That is expected: connecting a bank or card removes the unused starter account it replaces. One with activity, or one you renamed, stays.
- A notice says one bank account sits on two ledger accounts. It happens when you connect a bank and also import books that hold it. Follow Merge a duplicate bank account. If both accounts hold entries for the same dates, do not merge: email support@booksgpt.ai.
- BooksGPT will not change an account's type. Edit account says why before you save. Accounts Receivable, Accounts Payable and Retained Earnings never change type, because invoices, bills and the balance sheet depend on them.
Updated on: 16/10/2026
Thank you!